Float rods: pick the rod by the fish
Big fish need a rod with a long line; small fish take any rod. Buy by the fish:
• 38 species (e.g. Amemasu, Iwana, Ugui) need line strength ×3 or more: Yamabe rod 3.9 m (¥350, areas 1, 2, 4, 6); if you can wait until area 4, Hera rod 3 m (¥200) is cheaper
• 9 species (e.g. Maruta, Haze, Hasu) need line strength ×9–12 or more: Ayu carbon rod 10 m (¥1,500, areas 3, 4, 6); if you can wait until area 4, Hera rod 3 m (¥200) is cheaper
• 10 species (e.g. Raigyo, Brown trout, Namazu) need line strength ×15 or more: Ayu carbon rod 10 m (¥1,500, areas 3, 4, 6)
• 15 species (e.g. Oo-unagi, Kokuren, Akame) need line strength ×24 or more: Hera carbon rod 6.5 m (¥2,000, areas 4, 5, 6); if you can wait until area 5, Carp rod 5 m (¥1,500) is cheaper
Line strength ×N is how far a fish may run before the line breaks and the hook is lost; big fish are decided here (the giant eel needs ×24). The rod also sets where the fight meter starts, which is how many mistakes you can afford: Bitterling rod 2 m gives the best start against fish up to 15 cm; most of the other rods give the best start against fish of 16–35 cm; for fish over 35 cm almost any rod is the same; using Carp rod 5 m on small and mid-size fish loses 1.5 mistakes on average, so keep it for fish over 35 cm.
Never sold anywhere: Mountain stream carbon rod 6 m or Mabuna rod 3.3 m. Only sold by the special rod seller: Bitterling rod 2 m or Carp rod 5 m.Lure rods: pick the rod by the fish
Big fish need a rod with a long line; small fish take any rod. Buy by the fish:
• 27 species (e.g. Raigyo, Brown trout, Namazu) need line strength ×3–15 or more: the small lure rod (¥500, areas 1, 2, 3, 5, 6)
• 11 species (e.g. Oo-unagi, Kokuren, Akame) need line strength ×24 or more: the heavy-fish lure rod (¥650, area 4)
Line strength ×N is how far a fish may run before the line breaks and the hook is lost; big fish are decided here (the giant eel needs ×24). The rod also sets where the fight meter starts, which is how many mistakes you can afford: the small lure rod gives the best start against fish up to 15 cm; the large lure rod gives the best start against fish of 16–35 cm; for fish over 35 cm almost any rod is the same; using the heavy-fish lure rod on small and mid-size fish loses 1.0 mistakes on average, so keep it for fish over 35 cm.
Never sold anywhere: the medium lure rod. Only sold by the special rod seller: the heavy-fish lure rod. Casting and lure rods give you less time to aim below 100 HP; restore HP before you fish.Casting rods: pick the rod by the fish
Big fish need a rod with a long line; small fish take any rod. Buy by the fish:
• 25 species (e.g. Raigyo, Namazu, Numagarei) need line strength ×18 or more: the small casting rod (¥250, areas 1, 3, 4, 5, 6)
• 1 species (e.g. Kamuruchi) need line strength ×21 or more: the medium casting rod (¥600, areas 2, 4, 5, 6)
• 4 species (e.g. Oo-unagi, Aouo, Unagi) need line strength ×24 or more: the two-handed casting rod (¥1,500, area 6)
Line strength ×N is how far a fish may run before the line breaks and the hook is lost; big fish are decided here (the giant eel needs ×24). The rod also sets where the fight meter starts, which is how many mistakes you can afford: the small casting rod gives the best start against fish up to 15 cm; the medium casting rod gives the best start against fish of 16–35 cm; for fish over 35 cm almost any rod is the same; using the two-handed casting rod on small and mid-size fish loses 1.4 mistakes on average, so keep it for fish over 35 cm.
Only sold by the special rod seller: the two-handed casting rod. Casting and lure rods give you less time to aim below 100 HP; restore HP before you fish.Fly rods: pick the rod by the fish
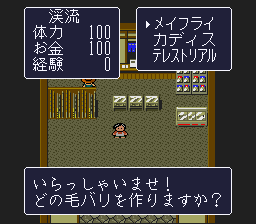
Big fish need a rod with a long line; small fish take any rod. Buy by the fish:
• 30 species (e.g. Brown trout, Amemasu, Sakuramasu) need line strength ×3–15 or more: the medium fly rod (¥400, areas 1, 2, 3, 5)
• 3 species (e.g. Aouo, Black bass, Nijimasu (rainbow trout)) want line strength ×24, but the longest rod is the large fly rod (¥450, areas 1, 2, 3, 4) (×21); it works, with some risk of the line breaking
Line strength ×N is how far a fish may run before the line breaks and the hook is lost; big fish are decided here. The rod also sets where the fight meter starts, which is how many mistakes you can afford: the medium fly rod gives the best start against fish of 16–35 cm; for fish over 35 cm almost any rod is the same; using the large fly rod on small and mid-size fish loses 1.7 mistakes on average, so keep it for fish over 35 cm.
Never sold anywhere: the small fly rod.